In this edition of ‘Meet the Photographer’, we have invited one of our active members Jeroen de Jongh to share his experience with our community.
As a starting point for long exposure photography, we recommend having a good tripod and a shutter release wireless remote or cable. But you can also use the self timer on your camera.
–
In the examples below, I have used my Nikon D7100 and Nikkor 16-85mm lens. This lens gives me both a nice bit of wide angle and plenty of zoom. As I do a lot of long exposure photography, and Photoshop isn’t quite my specialty, I use filters to get the photo right in such a way that I only need to do some basic fine tuning in the post processing (for which I use Lightroom in 95% of the cases, and the remaining 5% are divided between Silver Efex Pro and Photoshop).
Finding the Right Location
There are multiple sources for finding locations. Photo websites and apps like Flickr, 500PX, and Instagram provide a lot of inspiration, but just googling on the place you’d like to visit, or looking around on Google Maps have helped me too. Sunset times are easy enough to Google too, and I use The Photographer’s Ephemeris to see at what time I can find the perfect lighting for my photo idea. Sometimes however, just having knowledge of the wide area in which you live can be enough.
Using Filters & Low ISO
I like to use my Lee Big Stopper (adding 10 stops to my shutter time) and Singh-Ray Reversed 0.9 soft grad filter (adding another 3 stops to my shutter time).
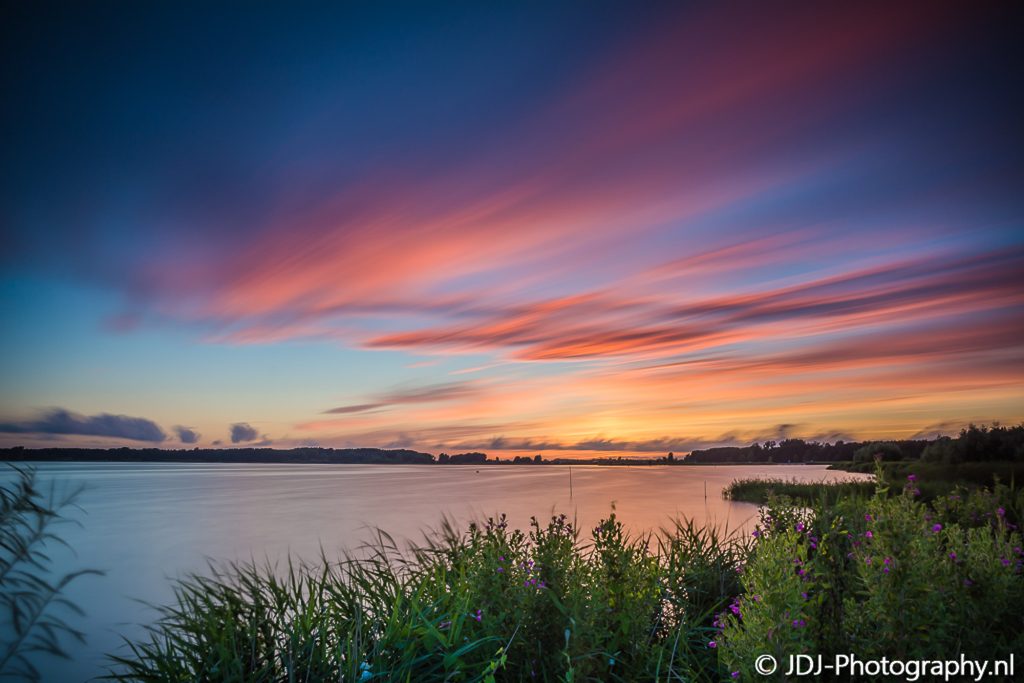
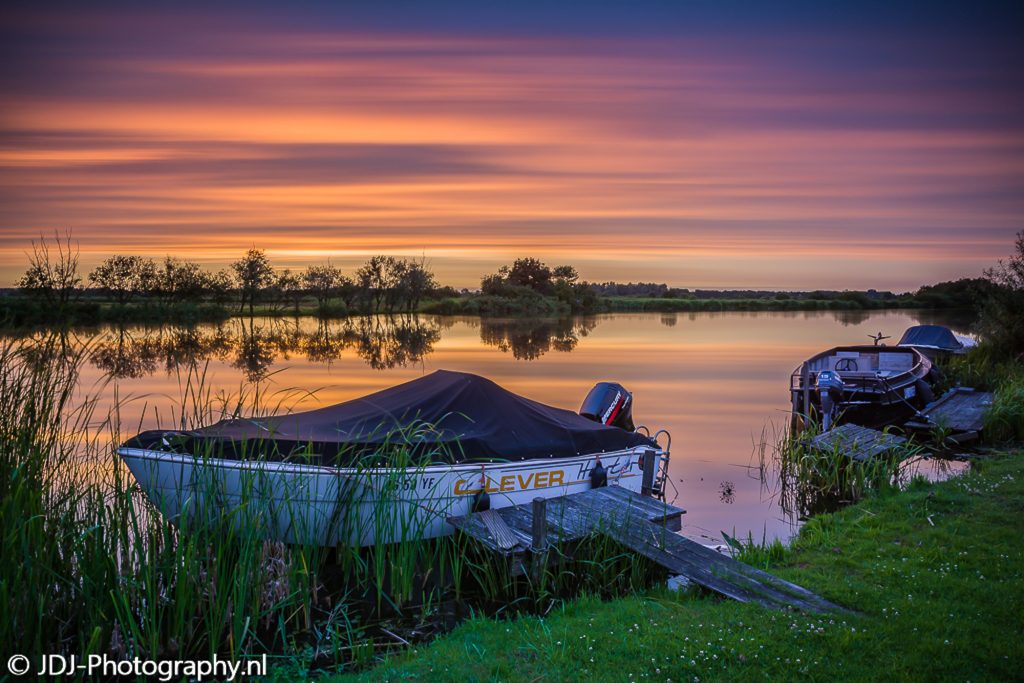
The aperture of both below shots is F/9, as I have experienced my photos to be sharp throughout (nearly) all of my photos. I keep my ISO at the lowest possible setting of 100 to keep the chance of getting noise in my photos as low as possible. The first photo, taken at a lake in the Twiske recreational area (just north of Amsterdam) has a shutter time of 331 seconds. The second photo has a shutter time of 244 seconds, and it’s taken while being on my way to again the Twiske recreational area, however I stopped when I saw the potential in this location.
Calculating Shutter Speeds & Post Processing
While there’s no particular reason behind these shutter times, other than the experience I have picked up in similar attempts in the past (although there are apps out there that can calculate what shutter time you roughly need when you use ND filters of certain stops), both shots have been processed in Lightroom. Like with all the coloured examples I am demonstrating here, I have lowered the highlights, raised the shadows, added brightness/contrast/clarity, boosted the colours slightly as the original RAW files tend to keep the colours more bland, added sharpness and noise reduction, correct any possible wide angle distortion, and I’m personally a fan of adding some vignette. This all sounds like a lot, but it doesn’t take me much longer than 5-10 minutes per photo.
While my Lee and Singh-Ray filters have to be shoved into a filter holder that you apply onto your lens (which I mostly tend to use around sunset, when the contrast between the sky and the landscape is at its biggest… along with around sunrise, obviously), I also still have a circular polarization filter of Hoya, and a 6 stop and 10 stop ND filter of B+W, that need to be screwed directly onto the lens.
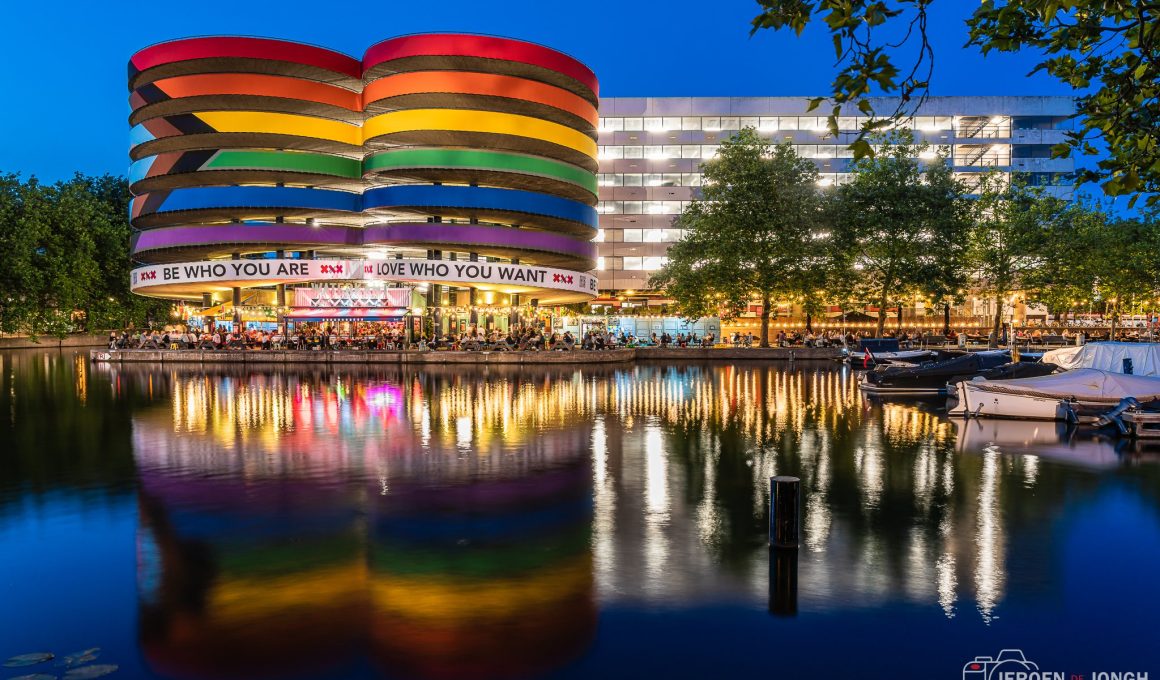
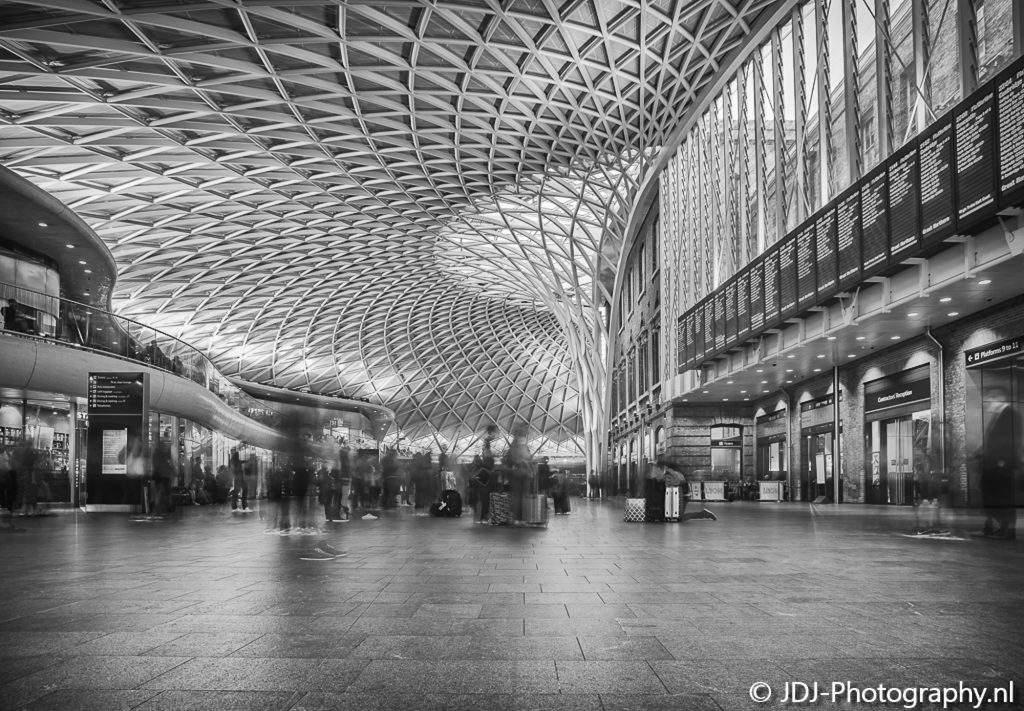
I tend to use these screw filters during the day (mostly because I don’t have a polarization filter yet that I can shove in my filter holder), which is when I used them for these two captures. The first is taken with my Hoya circular polarization filter and my B+W 10 stop ND filter at the NDSM, which is near where I live, the second is taken at London’s King’s Cross station (of which I got introduced on Flickr) with just my B+W 10 stop ND filter.
My NDSM shot has a 30 second shutter time, F/11 aperture, and ISO 100. My King’s Cross shot has a 209 second shutter time, F/9 aperture, and ISO 100. The latter photo is less processed in Lightroom (mostly regarding the colours, as I already knew I wanted to go for a B&W in this case), and more in Silver Efex Pro, where I have a couple of skins that I prefer to use, and then usually I’m adding contrast and vignette.
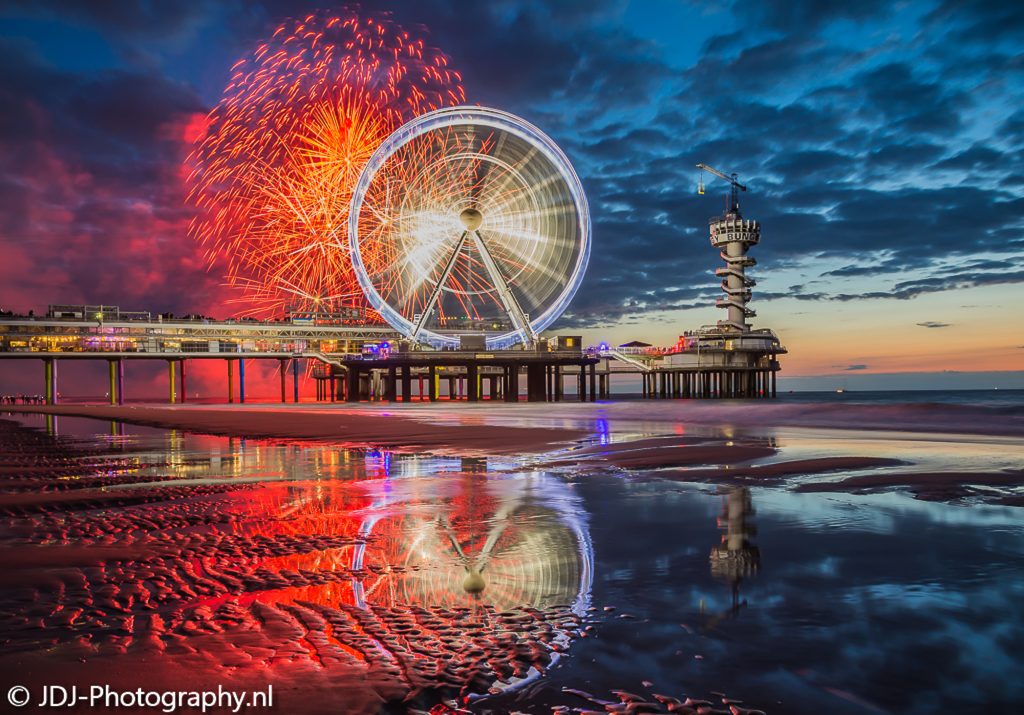
Sometimes, even I don’t need filters anymore. For example because it’s past the sunset, and there’s little contrast between the sky and the landscape anymore. Which is the case when I took this photo at the International Fireworks Festival in Scheveningen. I have seen a lot of photos of previous editions already, also made by the people of the Amsterdam Photo Club, but as my birthday is around the same time as the fireworks festival, I didn’t get around to check it out in the past. I finally did this year, which led to this photo, taken at 8 second shutter time, F/10 aperture, ISO 200.
Hopefully this item has provided you with some more information to help your own photography. However, if you still have some questions, please don’t hesitate to contact me. 🙂
Jeroen
www.jdj-photography.nl


Comments 1
Comments are closed.